Try the before and after
 BeforeAfter
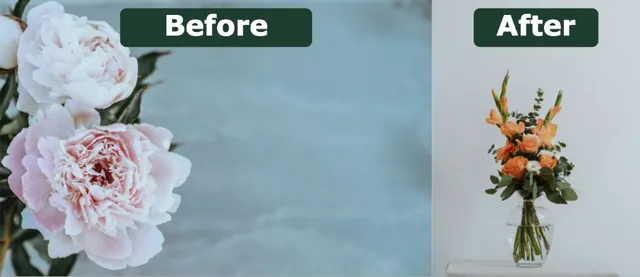
A before and after photo, side by side and labeled.
How to make a before and after photo
For a before and after photo, add two photos, the before photo first. They are joined side by side at the same height with no gaps, and the canvas grows to fit, so nothing is cropped. Tap Before / After labels above the canvas to add a label to each photo, or choose Stacked to put them top to bottom. The download keeps each photo complete, up to 4096 pixels on the longer side.
- Before and after photo, side by side or stacked
- Before / After labels in one tap
- Nothing cropped
Make a before and after photo in four steps
- Add the before photo firstThen add the after photo. Drag thumbnails in the strip if they end up the wrong way round.
- Side by side or stackedUse the buttons above the canvas. A stacked before and after photo suits wide shots such as rooms or landscapes.
- Add labelsTap Before / After labels. Select a label to change its words, color or size in Text & decor.
- Download the comparisonSave the before and after photo as a PNG or JPG. On a phone, Save or share sends it straight to Photos or a message.
Getting a fair comparison
Take both photos from the same spot, at the same distance and in similar light, so the change is easy to see.
Why use a before and after photo
A before and after photo makes progress obvious at a glance: a room makeover, a haircut, a garden or a photo edit. One before and after image is easier to share than two separate files.
Same height or same width
Side by side gives both photos the same height. Stacked gives them the same width. Either way each photo keeps its full shape.
Labels you can change
The labels are ordinary text boxes: rename them to “Day 1” and “Day 30”, move them or delete them. Tap the button again to remove both.
Before and after questions
Still stuck? Email support@collagemaker.org.
Which side should the before photo go on?
Most people read left to right, so put the before photo on the left, or on top when stacked. Drag thumbnails in the photo strip to swap them.
What if the two photos are different sizes?
They are shown at the same height side by side, or the same width when stacked, so a phone photo and a camera photo still line up without cropping.
Can I show more than two stages?
Yes. Add up to 30 photos for a longer sequence, such as week 1, week 4 and week 8. The labels go on the first two; add more words in Text & decor.
Can I change the before and after labels?
Yes. Select a label on the canvas, then edit the words, color and size in Text & decor.
 Combine photos
 Instagram collage maker
 Photo grid maker